Pages

Showing posts with label Tape. Show all posts

Monday, August 13, 2012

Neutral 'Interview' Nails... with a Twist

Good Morning Lovlies!

I really hate being sick! :( I had a cold last week which kept me down because I was sleeping every chance I had so didn't have time to post. I did, however, still paint my nails. I had a chat last week about possible job opportunities and I wanted to keep my nails neutral for this chat. It was kind of an interview but I know the person well so it wasn't like a normal interview. It went well though!! Even though I tried to keep my nails neutral she still commented on how pretty they are. This happened again yesterday with someone else but I'll save that story for later because it's heart warming. :)

I used my favorite neutral so far (and pretty much my only opaque one until I get more from the new OPI Germany collection!) OPI Dulce de Leche!

Here are the pics! The sun pics give a better representation of the color(s).


I decided to add a little something. Can't just wear one color!! 
OPI DS Opulence with a bit of NOPI Over the Gold Shoulder


I added some tape nail art the next day or so :)
It makes me think of caramel and cherry chocolate delicacies! Yumm


I used blue painters tape this time. It was nice because it didn't tear and leave bits of tape on my wet nails. However, it didn't leave straight lines either. 

I figured you might be wondering how I got the circle on my index finger so I took a couple pics for you! I placed the hole reinforcement on the corner of the blue tape and drew a line. I then used the line as a guide to cut the circle shape. I placed it on my nail and painted then pulled it off.  


And for the bottle shot. OPI: IS&ImAC is a darker burgundy/ maroon color. Desert sun is a perfect caramel color that I feel I should be able to eat! You get a better representation in the nail shots. 


Wednesday, May 9, 2012

#8 Matte Magic


April Showers Bring May Flowers 
hosted by: Polished Prisms

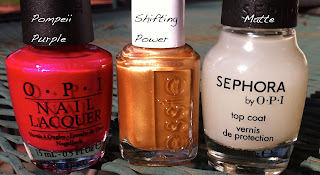
I find that Matte polish is most noticeable on dark cremes. Since this is a spring challenge I went with a dark hot pink and did a diagonal tape mani to show matte vs. shiny!

Before Matte
 Sun
Shade
The Polishes

You can see how the reflection stops at where the Matte starts. I loved the color combo (just not the bubbles) and once I start stamping I want to use this same color combo! :)

Time to see all the other awesome polishes!
Time to check on the other ladies :)

Thursday, March 15, 2012

Girly Girl: Inspired by the Runway

I don't really follow anything. Never have. (except now I'm following nail blogs. weird) so I went through HUNDREDS of Runway photos for Spring 2012 and my favorite collection is Marc Jacobs' Gatsby collection and the look that stood out the most was this color block swimsuit. Pink and Green are my favorite colors :)


And here is my mani!


Here are my Polishes

OPI: La Paz-itively Hot, Orly: Happy Ever After
OPI: Fly, and OPI: Don't Mess with OPI (mixed to make teal)

I'm glad I got this mani done so quickly because I'm super happy with it and I plan on wearing it for a few days. (and excited it has green in it for St Patty's Day!) I decided to paint a solid layer of the pink and then layer the other colors. I loved this Hot Pink so much I had to take pics to show you. This is only 1 Coat! How fun is that! I am so in love with this color- it's the Hottest Hot Pink Ever! :) 


Both pics are outside. Shade and Sun (even though its a bit cloudy)


Check out what the other Girly Girls are doing!


Lindsey of Neverland Nail Blog
Stephanie of A Little Polish
Kelly of DevilishPolish
Jodi of Captivating Claws
Danielle of Rock'n'Polish
Elly of Polishable
Olivia of Unprofessional Nails
Kate of This Charming Kate
Bethany of  A Plethora of Nails
Lizzy of The Do It Yourself Lady
Eugenia of Talon-ted
Johanna of Neues vom Kellerkind
Amanda of Nox Nails
Ashley of Smashley Sparkles
Sarah of See Sarah Swatch
Emily of The Lacquerologist
Jess of LuvMyLacquer
Tressa of O' Natur Nail
ChiChi of I'm just me...ChiChi 
Amanda of Berry Polished 
Robin, Erin, and Anna of Polished Cousins
Bonny of Over Stuffed 
Taylor of REJOICE! 
Jess of Nearly Natural Nails  

Saturday, February 18, 2012

Nail Art: Third Time's A Charm!

Harry Potter Nails!

I mentioned in my last post that I had already done my nails again and I'm very happy with the result. Not perfect by any means but definitely a step in the right direction! I've had people comment on them and they are always impressed I did them myself. ;)

How they came about: I recently ordered "The 'It' Color" by OPI online. I've wanted this color for a while but when I couldn't find it locally I went ahead and purchased from an Amazon seller. (Of course, after buying online the next time I walked into Ulta it was right there! Ugh!). It came in the mail after my polka dot attempt and was next in line for my nails! Super Excited! I went to go get 'Vampsterdam' but decided it was too purple for me so got a different color and decided to pair it with the golden yellow. I've wanted to try using tape for my Nail Art Mani and found my scissors for it. When I saw the jagged one I thought it would go perfectly with my yellow polish and I could do a lightning bolt. This is the result!


So now for the Polishes
OPI: Base Coat
OPI: The 'It' Color
OPI: Diva of Geneva
OPI: Top Coat
Ring Finger:
OPI: OPI Inc.
China Glaze: Lighthouse


The OPI color 'Diva of Geneva' is a really cool maroon/fuscia/dark purple kind of color. You can see how it changes from an indoor yellowish light to outside light. Loves it!


Method: I used 2 coats of 'The It Color' (This polish is thick but doesn't go on evenly. 2 coats is a must!) and once that completely dried I started the 'artistic process.' I used regular tape (I might try painters tape at some point.) and my fancy scissors to cut the tape. I did the lightning bolts first. I cut the tape really thin and at a slight angle. I painted 1 coat of 'OPI Inc.' and then used tweezers to peel off the tape. *Note: take tape off immediately and DO NOT allow to dry because it will leave a fuzzy line! (Like I said, not a perfect mani!). I then proceeded to do the rest of my nails. :) As a design note: you will see that I placed the top of the tape at the middle/top of the fingernail. This turned out much better for the jagged lines. I didn't take a picture of my left hand because of the fuzzy lines and bad placement of the tape. The very last step was to use a teeny tiny paint brush to fill in the lightning bolt on my ring finger with the sparkly gold color!